Showing posts with label holiday. Show all posts

Wednesday, February 23, 2011

Valentine Dessert Stand

This is my last Valentine's Post I promise. I don't know who I am suppose to give credit to for this idea. The blog world has been swamped with all kind of platter making. I have no idea where it originated from. Once again this was one of the things that I made for our February activity for church, but like I said it got canceled. I still want to preserve my ideas. So here is my creations on the Valentine Stands. They were suppose to be for the dessert table.
I grabbed some heart plates, bowls, and little flower vases. I started with a plate and hot glued one of the vases to it. I used hot glue, because it made it sturdy enough to hold for a little while. Later on after I wash them I can peel them off of each other and store easily. If you want them to be permanently stuck like that use a stronger glue.
I made several different varieties. It adds more character to the table when there are different heights and levels. My first was a short one plate with a bowl on top. Cost to make: $2.15
Second. A little taller with 2 plates. I liked having the bowl underneath the second plate. It gives it more detail and adds height. Cost to make: $2.85
Lastly, the 3 tier. 2 plates with a bowl on top. I still had the other bowl underneath the 2nd plate like in the previous picture. I just added another vase and bowl on top of the 2nd plate. Cost to make: $4.25

I bought these plates the day after Valentine's so I got them for 1/2 off. Having your activity after the actual holiday has its perks. I love catching sales

Friday, February 18, 2011

Coffe Filter Carnation

All month long I have been planning our church's February activity. Of course being the month about love. Our activity was going to be how to strengthen your marriage. I was surfing the web and came across Ashley's Craft Corner. she made these foe carnation flowers . I thought they would be a nice centerpiece for the tables and some extras to have around for the dessert table. I made a few adjustments to mine so I could call them my own. Since red is the color for Love. We decided to make all the decor red and white. It was a no brainer.
First, you start off by making an "O" with your hand
Then stuff a coffee filter in. This is where my variation came in. Ashley dipped her ends into paint and water. Paint and me don't mix, and I didn't want to wait around for them to try before I could start assembling. So I took a red permanent marker and ran it over all the edges of the coffee filter. I know the marker in the picture is green, but my kids ran off with my red one. It was the next marker closest to me at the time.
When you are done marking all the edges twist the end

and squeeze inside one of the holes of a wiffle ball. Keep repeating this step until you have half of the ball covered. Then insert into a vase, planter, box, etc. What ever you want to use. I ended up using a white gift box that you get in the party section at Wall-e world. They come in a pack of 8 for like $1. Finish off with some red ribbon and there you have it folks.

Another cheap, yet sophisticated, project accomplished. You could make 8 of these for around $3.00

Now for some bad news. I have found out that our church building will be closed that whole week of our activity, due to renovations. Therefore, our activity is canceled. Bummer, now what am I going to do with these flowers?

Tuesday, February 1, 2011

Stud Muffin

For Valentine's Day you might want to surprise your man with these. I don't know anybody who doesn't like being served breakfast in bed.

Me and my husband have been bickering lately, so I served my "Stud Muffin" up early. Good news, he woke up with a smile on his face, and the rest of the day went pretty smoothly. There is nothing like food to settle a fight

There is nothing special to making these. Its the thought and the creative way to twist your words. Just whip up a batch of your favorite muffins and make a card that refers to him being a "Stud Muffin". My card says, "Hey, Stud Muffin.....will you be mine?" Short, sweet, and to the point. Just how guys like it.

Sunday, December 19, 2010

Church Christmas Party

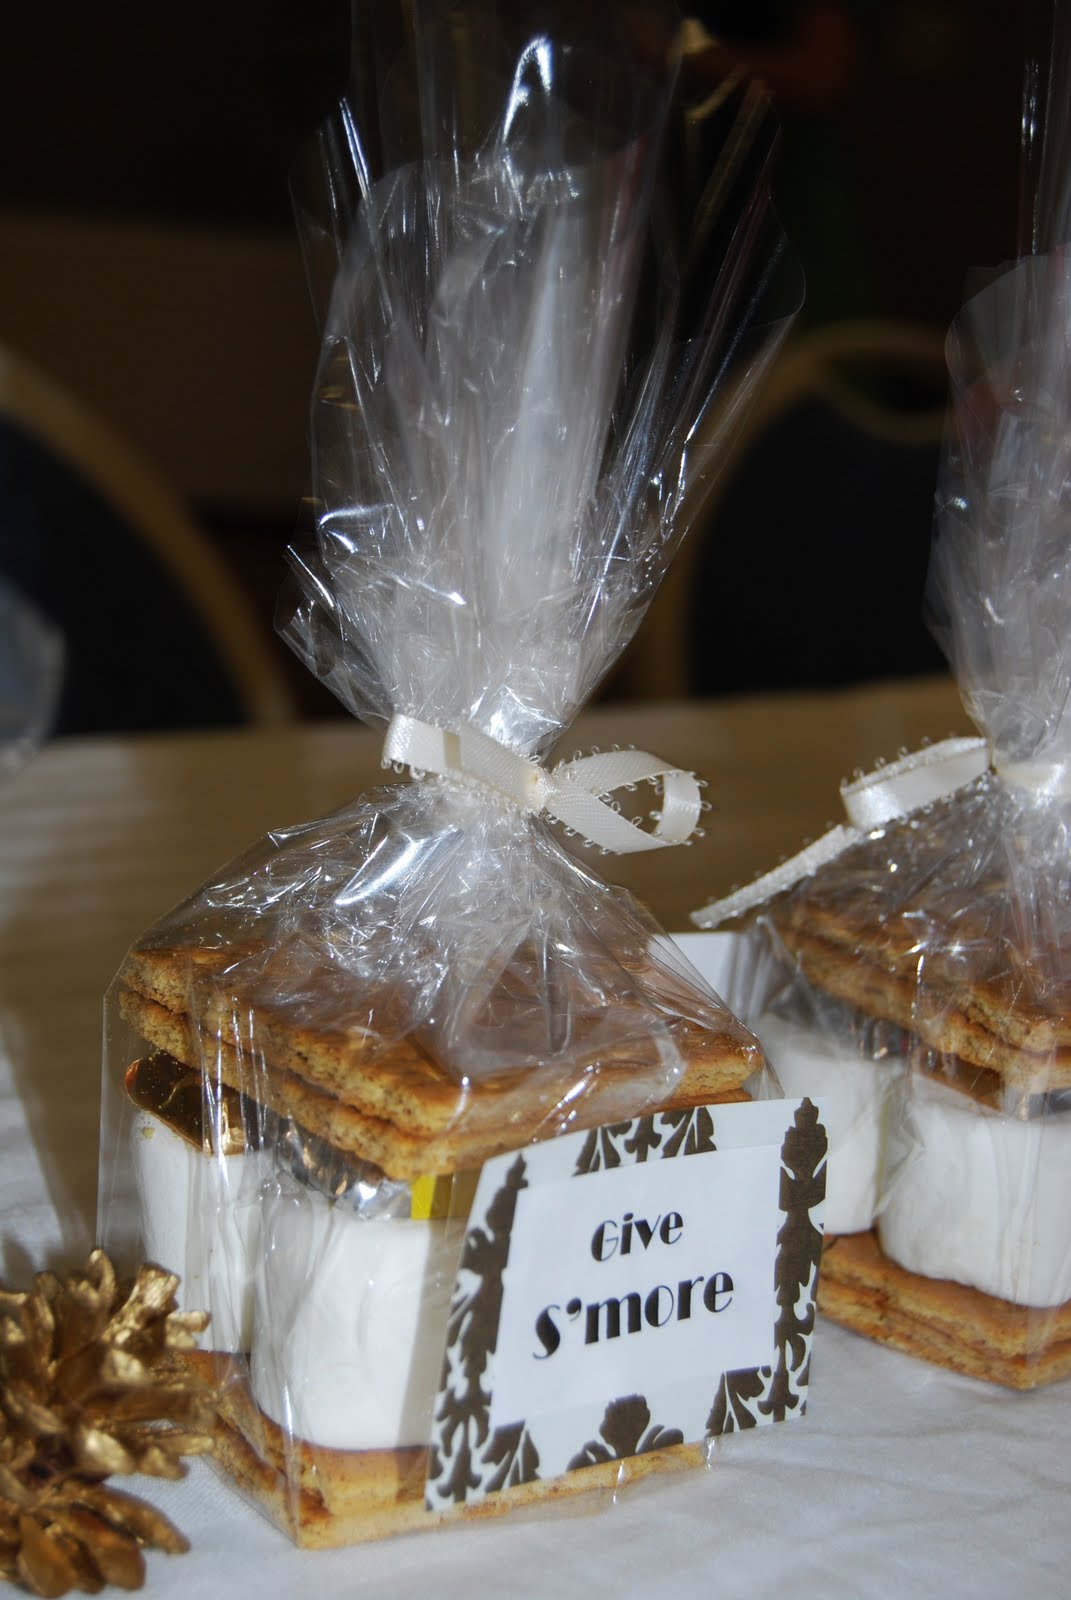
At the beginning of the month we had our church's Christmas party. I was in charge of decorating. Our theme was "Give S'more" When you think of s'mores you think of a warm toasted fire. So here is the one I madeI went by an appliance warehouse and got a refrigerator cardboard box that they were throwing away. I cut a hole for an opening and spray painted it red and added some brown lines for bricks. I stacked some wood logs like I was going to make a fire. Our church doesn't allow real fires in the building, so I wrapped white lights around the logs and stuffed with red and orange tissue paper.
Then for the tables I had them lined with mini fires as well. Here is a closer look. I just made a skinny rectangle box, painted it brown, and stuffed with some more red and orange tissue paper. (If you want more exact measurements of the boxes I will post a tutorial later.) In between each fire box we had our little "Give S'more" handouts for the sisters to take home when they were done eating.You might remember these from my previous post. I just packaged mine a little differently. I also thought that a Hot Chocolate Bar would be good to keep us warm by the fire. Some ingredients we had...crushed Ande's mints, peppermint sticks, orange peelings, chocolate covered spoons, and of course marshmallows. I also had flavored creamers, but I forgot to pull them out until later after I already took the picture. The flavorings were vanilla, gingerbread, & sugar and spice.
The whole bar picture. My favorite combination was the crushed Ande's mints stirred with a peppermint stick. Mmmmm....
We had a beautiful musical number done by some very talented sisters in our ward. I had never seen a harp in real life before so I was excited
Here are the sisters caught in action. The pictures don't do the room justice. All of the lights were cut off except for one set. The room had a warm glow with all of the christmas lights surrounding around everywhere.

Remember this Holiday Season that you can never GIVE enough. There is always room to "Give S'more" Merry Christmas to all

Friday, December 17, 2010

Christmas Gifts

Today was the last day of school before the holiday break. Of course we had to come bearing gifts. I had some flash back moments of things I have found while blog hopping. I thought it was about time that I made something that I've actually posted on this blog. I thought for the teachers I would do the Crayon Monogramming frames found at this old post. She made her's with the teacher's initial, but I wanted the gift to go to both the teacher and her assistance, so I decided to do their room number instead. That way they could hang it out on their wall to give it character instead of having your plain,boring, ugly, brown plaque that they put out to label all the doors. Here is what I came up with...
A1 is Anthony's classroom and KF is Isabel's classroom. I think they were a big hit, because Isabel's teacher actually started crying and hung it up right away. Another teacher walked in and saw how cute they were and said she wanted to put an order in for me to make her one too.
Yes, I did make them 2 different styles. Anthony wanted his with more chunky letters and Isabel wanted to keep it sleek and simple. Either way is cute.
Now for the wrapping...
I had another flash back from this post and thought it would make a perfect bow to top my present box off with. Who doesn't like M&M (many & many) Thanks!

For the kids it wasn't anything out of the ordinary. Everybody has seen them before. Its the famous Reindeer Candy Canes. But I added a twist. We made reindeer food to go along with them. That way they could sprinkle some in the yard on Christmas Eve for the reindeer to snack on while Santa is putting presents under the tree. How do you make reindeer food? I'm glad you asked.They eat practically anything you have in your pantry. What I had on stock...Peanuts, oats, parsley (for flakes of grass), red & green sprinkles, and for the magic touch, some confetti and silver pixie dust (glitter) to help give them power to fly.
Mix it all up in a zip lock bag and shake. I tried mix it in a bowl, but all the glitter stuck to the sides. It didn't work, but some how shaking it in a bag did. Transfer them into little mini ziplock bags you find in the jewelry making section at walmart.
Print off direction sheets, so the kids will know what to do with it and slide it into the bag. Lastly, tie on your reindeer candy canes and VOILA!
Anthony wanted blue and white Reindeer
And Isabel wanted Rainbow ones.
The kids enjoyed their Christmas Party at school. And they loved to pass out their little treats that they made for their friends. Happy Holidays! Enjoy the break